Welcome to Eclectica Monday!
(If you’re new to EM: I worked with Paper Artsy to create a range of stamps. They’re designed to be used for art journaling and cardmaking…and whatever else you can think of! In this blog series, I want to share a few project ideas for using the stamps. Today we’ll explore with ESN03.)
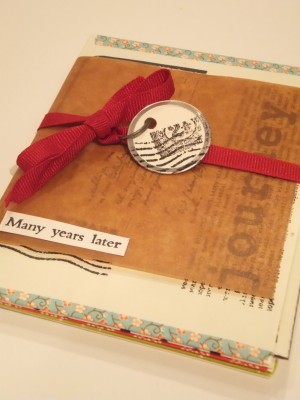
For this week’s project, I wanted to show a gift-y design…plus, I discovered that I have a huge number of envelopes in my stash that don’t have cards to go with them. And get this: These envelopes are so old that the glue has sealed. So I have a bunch of sealed envelopes! What the heck can you do with those? Um, make an envelope book!
Okay, here’s what you’ll need:
– Eclectica ESN03 from Paper Artsy
– Crunchy Waxed Paper from Paper Artsy
– 6 white envelopes
– Metal tag, ribbon, washi tape
– Archival Black ink from Ranger
– Card blank
– Cardboard piece (4″ x 1 3/4″)
– Eyelet and setter
– Black pen
– Heavyweight kraft cardstock or lightweight cardboard (2 1/2″ x 3 1/2″)
– Coin envelope (4 1/4″ x 2 1/2″)
– Glue stick
Here’s how to do it—
Oh, wait: One thing to note–washi tape is not really that sticky, so I always use a touch of glue stick to adhere it securely. Different brands of washi tape vary in stickiness, but I’ve found most can use a little extra glue, especially if it’s used to hold things together, like these envelopes.
1) Make sure each envelope is sealed, then trim about 1/8″ off the sealed flap end. Repeat with all envelopes so that you have 5 pockets.

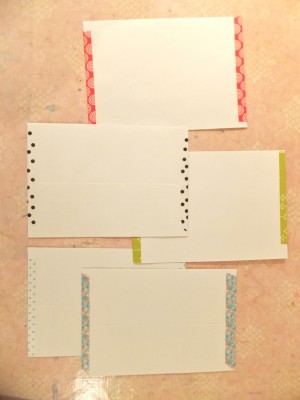
2) Add washi tape around the short sides of each envelope.
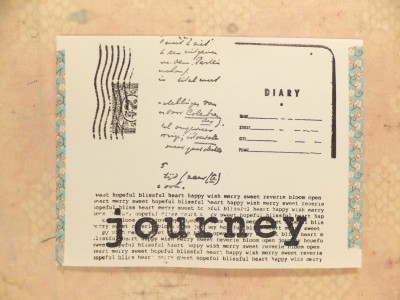
3) Choose one envelope to be on top, and stamp it with various elements.
4) Glue the envelopes together, with all the open edges aligned.
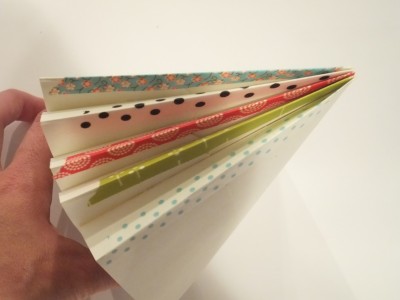
Each of the envelopes can have something to tuck inside. I chose to do a simple card, plus a couple of tags. I thought the fifth envelope could contain a handwritten letter, a gift card or money gift.
5) For the card: My card is 5 1/2″ x 4 1/4″. I cut off 1 1/2″ from the bottom of the card, then lined it with a piece of waxed paper. The waxed paper is attached with washi tape. (And extra stick glue.) Stamp “Adventure” on the card front, then add another strip of green washi tape. Stamp “Disappear here” at the top right. Ink the outside edges of the card, avoiding the waxed paper. (The ink won’t stay on the waxed paper.)
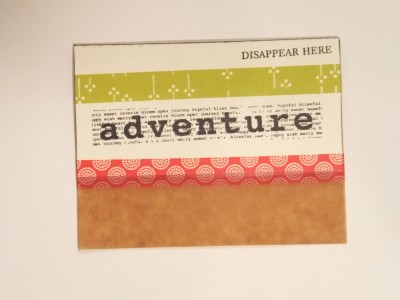
6) Cardboard tag: I had this leftover bit of cardboard laying around my studio so I decided to add a little message as a tag. Insert an eyelet at one end, then stamp “the only place…”. Add washi tape. Stamp “the only place” again on white paper, then cut letters to spell “here”. Glue to the cardboard tag, then write “right” and add the colon. Fold a piece of green washi tape sticky-sides together, thread through the eyelet and tie.
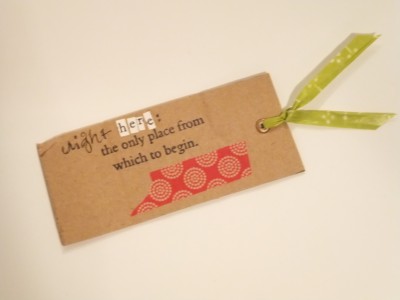
7) Kraft tag: This tag is made from recycled packing material–it’s a lightweight, flat cardboard measuring 2 1/2″ x 3 1/2″. Stamp the text on the right side, then add two strips of washi tape overlapping. Stamp “fragile”. Cut a small heart shape from washi tape, add to the tag and outline with black pen.
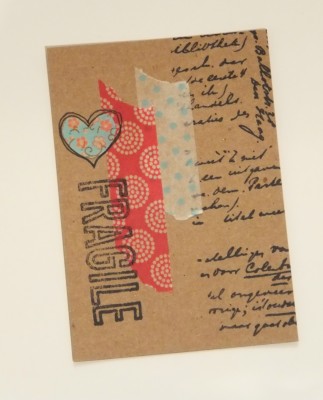
8) Mini envelope: Stamp the diary on a piece of leftover envelope. Glue to the back of the coin envelope, then stamp “fragile”. Add washi tape.
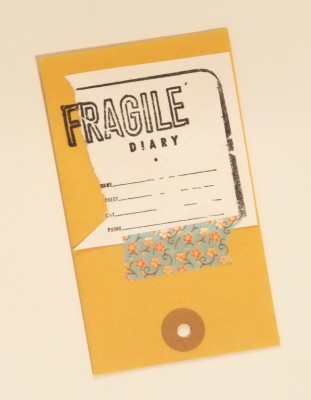
9) Stamp “many years later” on white paper (or an extra envelope) and cut out.
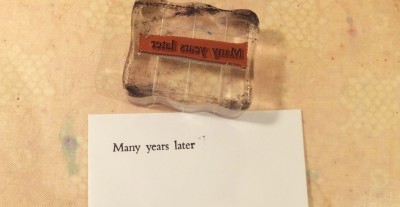
10) Cut an 8 1/4″ x 4 1/4″ piece of waxed paper. Wrap the waxed paper around the spine of the envelopes, then wrap with ribbon. Add the stamped sentiment. Stamp a metal ring with the postmark and tie on the ribbon.
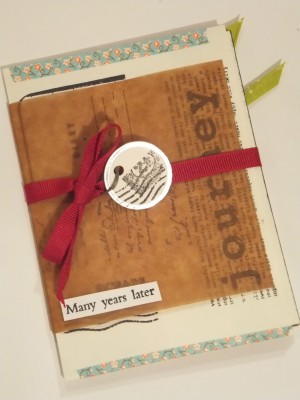
Next step? Gift it to someone special! 🙂
Oh, yes—the Eclectica stamps are available worldwide from Paper Artsy; if you’re in the UK or Europe you can also find them at Paper Artsy retailers.
Happy Monday!


Another brilliant idea! Thanks for giving us inspiration at every turn.
Thanks for your sweet comment, Janet! 🙂