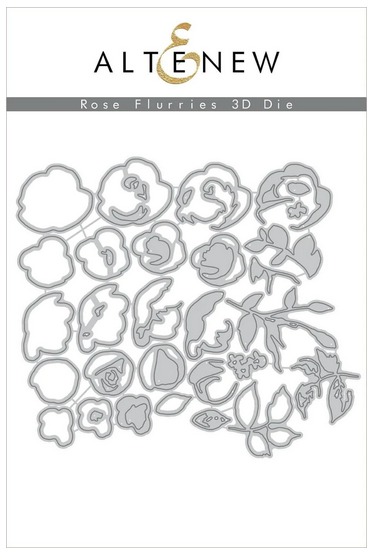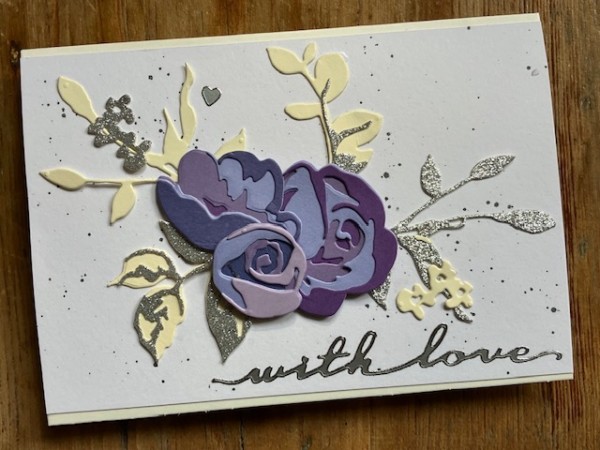
Looking for a show-stopping card focal, that’s virtually foolproof to make? (Aren’t we all?) Well, I think I might have something for you.
Layering 3D cutting dies, like this Rose Flurries 3D die from Altenew, is one of my favorite techniques. This is my go-to when I’m limited on time, brain space, and/or creativity. It’s a bit like paint-by-numbers, as you just follow a prescribed format, but it’s also super-relaxing and gives you a really pretty finished result. This is a great way to fill a rainy day with low-stress crafting.
Let’s look at the die set, above. There are several flowers and a couple of leaf clusters in this set—since many of them are small, I grouped mine by flower number and bagged them separately so it saves me time searching for various pieces.
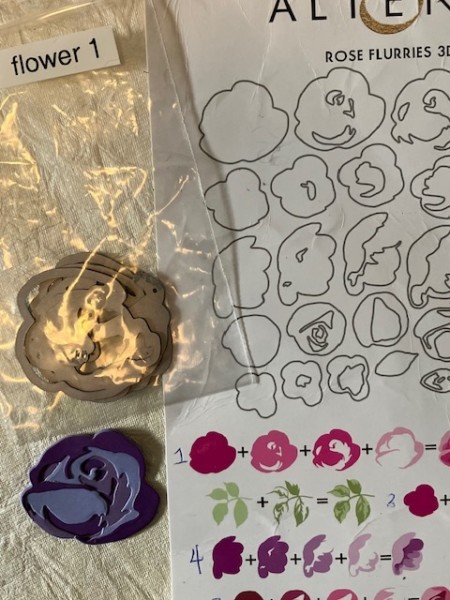
Before I cut anything, I pull the pieces out of the bag and decide which color I’ll cut from each piece:
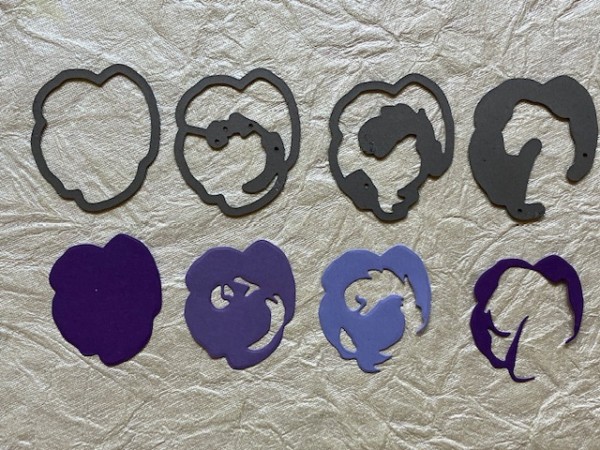
This is a great way to use up scraps of cardstock, too. I like to do tone-on-tone shades but you could also do some high-contrast effects, or use patterned paper.
The photo above is Flower #1—the dies, plus the shapes each one will cut just beneath it. To build the pieces into a dimensional flower, simply glue each one on top of the other. The largest piece (bottom, far left) is the base piece. The one on the far right will be on the very top.
Here’s another look—
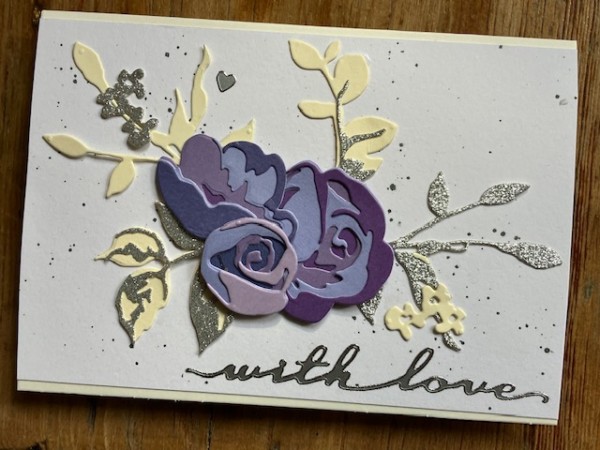
I die-cut the leaves and foliage from cream and silver glitter cardstock, then put the whole piece onto an ink-spattered background and added a silver metallic Dazzle greeting sticker from Paper Wishes.
Here’s another card example, using the Peony Dream 3D collection.
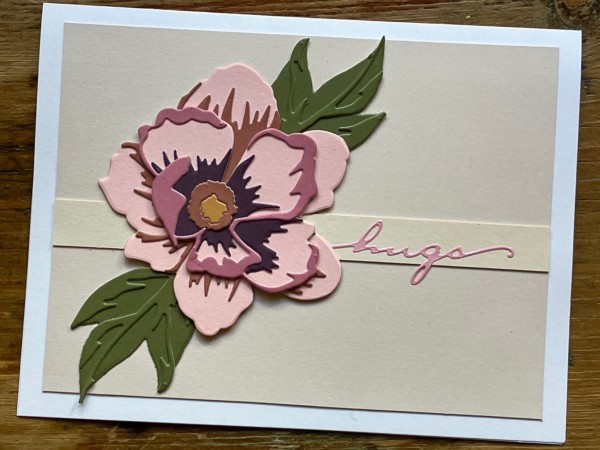
This set works the very same way, but has two flower possibilities. There’s a large, full blossom like the one you see above. But, you can also create a smaller blossom that looks almost like its in profile. The flower I have on my card is the smaller blossom layered onto two additional die-cut pieces to make the full blossom.
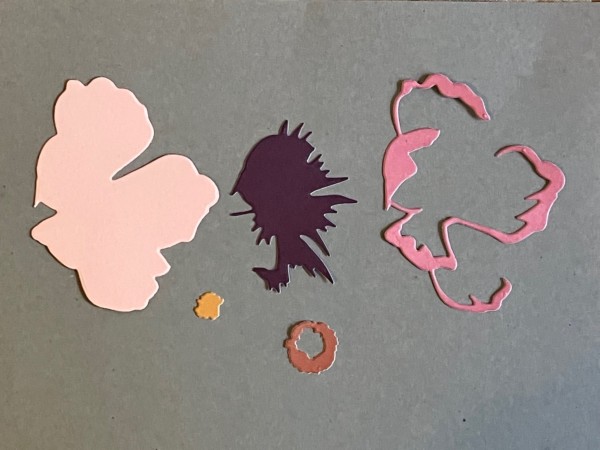
Above is the smaller flower, laid out. And below you can see the process for layering.
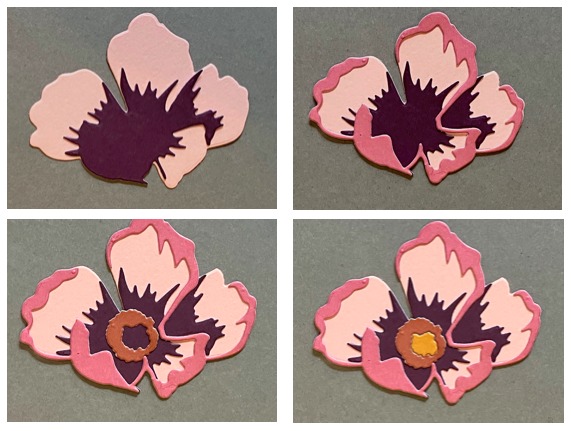
And then you can simply use this piece as it is, or layer it onto the other two flower elements: One base, and a second layer. That’s the first photo you see on the left below. Then take the smaller flower (top right) and glue it on top. You’ll have the center image. Then for the leaves, super simple: A base piece and detail. Here I’ve cut them from the same color of cardstock.
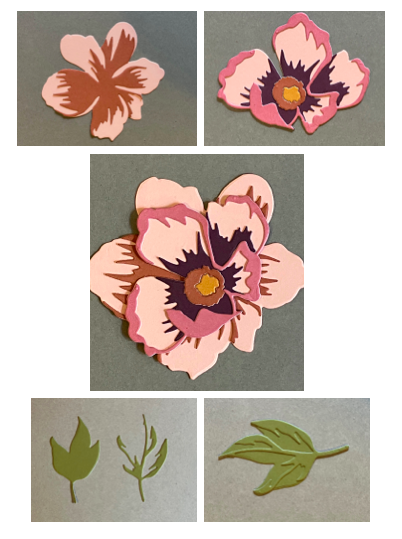
Here’s a closer look:
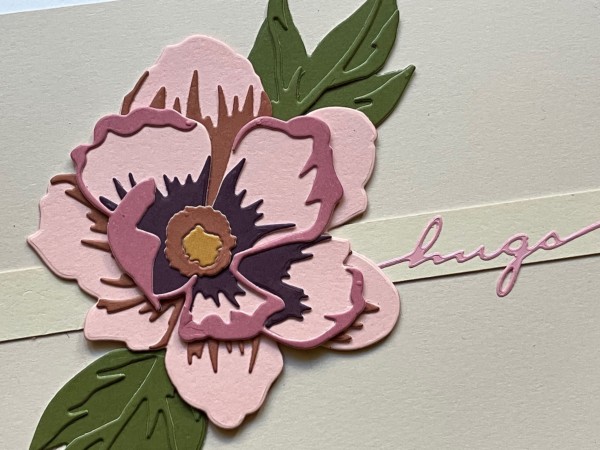
And for the card itself, I’ve just placed the flower and two leaves diagonally onto cream cardstock and added another sticker sentiment. Easy!
I hope you enjoy—don’t forget to check my Facebook page, as I’ll have a step-by-step video showing the Peony die.
See you next week!

