Grab a coffee or a cup of tea and pull up a chair—it’s Monday Morning Review!
Each Monday for the next 6 weeks, I’ll share with you a favorite product, book or magazine I come across in my crafty process.
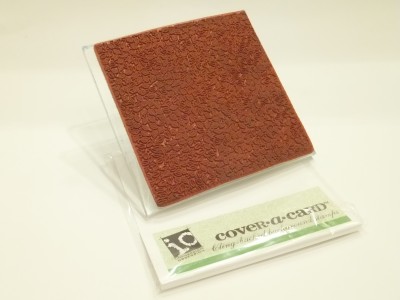
This week I’ve just got to show you the Cover-a-Card stamps from Impression Obsession. These super-big (5 3/4″ square) red rubber stamps are a lot of fun and even better, they give a beautiful impression.
I’ve been stamping for a looooong time, and can remember some of the first “big” stamps I bought. I also remember having to experiment to get the right pressure when stamping these big wood mounted stamps. Sometimes you pressed a little too hard on one corner, then ended up with a bald spot in the center. It could be really frustrating!
Well, recently, my mother (who is a dedicated cardmaker and stamper) got me hooked on Impression Obsessions Cover-a-Card stamps. These are biggies, and initially I was a little skeptical of how well they would stamp. But to my delight, they really do stamp beautifully.
One thing you do need is a Mega Mount, also from Impression Obsession. There’s something about the block, which has a big heavy handle and a slight curve, that gives a great impression each time. (And of course you can use it with other unmounted stamps too.)
The only time I did not have a perfect result is when I stamped this Leaves pattern onto slightly textured paper. I didn’t really notice the texture at first, but then realized that was causing the detailed image to transfer imperfectly. With any stamp, the type of paper you use is really important in getting a crisp image—so choose a smooth, glossy or matte cardstock or paper for best results on any stamp design. It’s easy to forget how important the paper is!
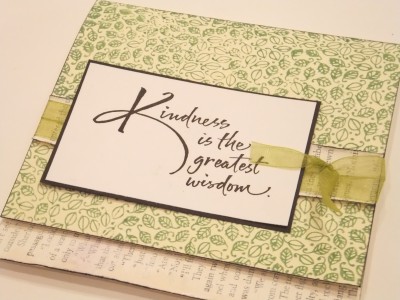
For this card, I stamped the Leaves onto the card front, using Colorbox’s Jungle pigment ink. After it dried, I trimmed off 1″ from the bottom of the card front. The inside back of the card is lined with book paper that was painted with white acrylic. Another strip of the white painted paper is glued across the card front. I wrapped sheer green ribbon around the card front and secured it to the front. The ends are concealed by the stamped sentiment, which is from Inky Antics.
I inked the outside edge of the card with black as a final touch.
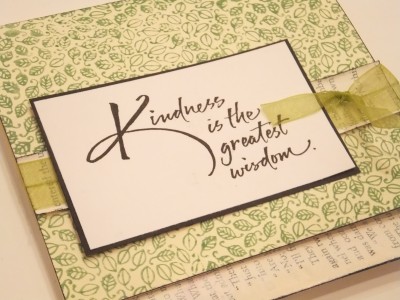
This card was super-quick and easy to make. I also like that you can experiment with different inks (pigment ink will give a “wetter” effect than, say, dye-based ink) and different types of paper and cardstock. Remember that pigment ink stays wet longer, so it’s easier to cover the stamp completely before stamping. A solvent-based ink, or one designed to be quick-drying, can sometimes dry before you ink up the whole stamp! Personally, I love this green pigment ink on cream matte cardstock, although I’d also like to brayer a glossy cardstock background and then stamp this with dye-based ink.
Oh! And these stamps also emboss beautifully. For videos showing those results, pop over to Studio SN on You Tube. You can see how I’ve used the Spatter design in How to Create a Distress Stain Resist, and the Honeycomb in Dylusions and Heat-Embossing.
And although the stamps are called Cover-a-Card, you can also stamp the design and cut it apart into strips or die-cut it, too. Hmmm…there’s another idea!
The Cover-a-Card stamps retail for about $13.00-14.00. I’ve gotten all of mine from an independent retailer, so the price sticker on the stamp says $14.29 but I’m happy to pay a little more to support a local biz. The Mega Mount is $25.00 which at first seems a bit spendy but then I realized I’ve spent that much on a set of blocks before—of course, blocks will last you ages, so they’re a good investment. And if you like the Cover-a-Card stamps and end up with several of them, then this is really a must-have.
My personal favorite designs? Spatter, Fizz and Honeycomb.
Hope you enjoyed today’s Monday Morning Review! For more info on Cover-a-Card stamps, check out your local retailer or pop over to Impression Obsession. For a fantastic demo on using the Mega Mount, check out Laura Fulcher’s You Tube video.
Have a great week!


