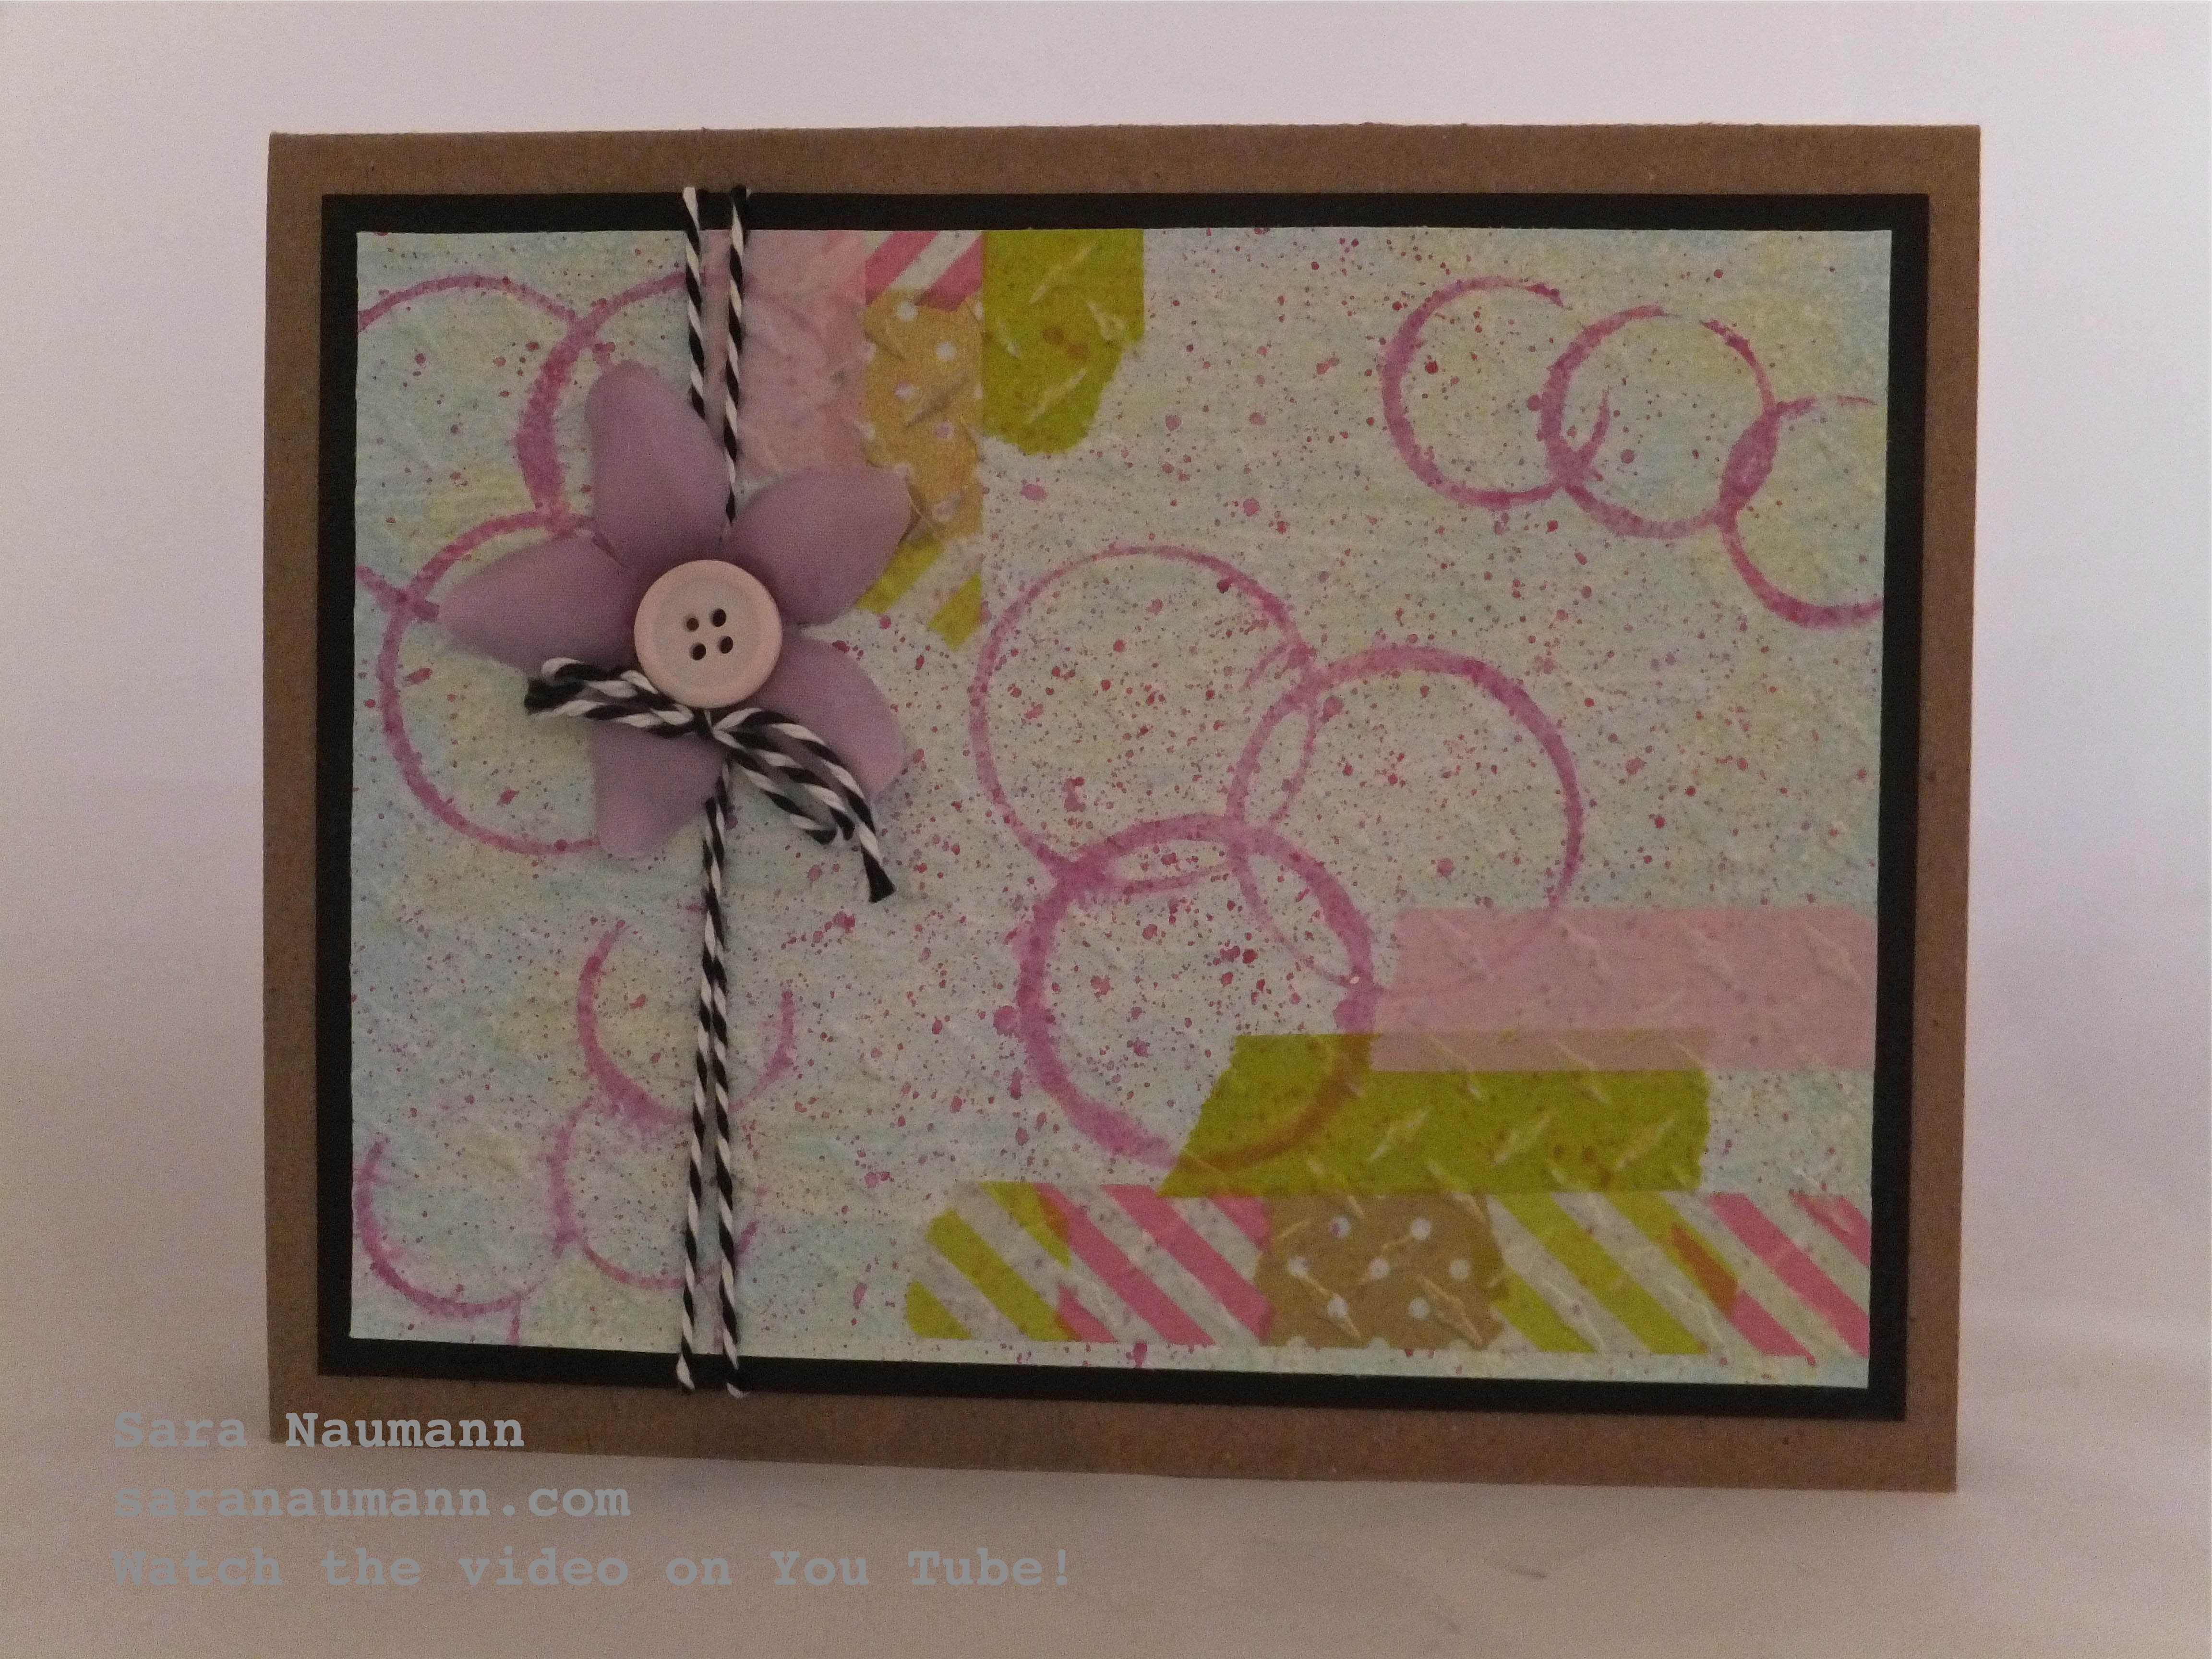
Today on Studio SN: Cardmaking with Distress Paint and Dylusions!
I love my paints and I love my color sprays…and while these supplies are fabulous on their own, they also make fun backgrounds when you combine them! This card actually has four layers of color—2 Distress Paint colors, and 2 Dylusions.
Cardmaking with Distress Paint and Dylusions, what you need—
– Distress Paints: Tumbled Glass, Squeezed Lemonade (Ranger)
– Dylusions Color Sprays: White Linen, Bubble Gum Pink (Ranger)
– Washi tapes: Pink, green, pink/green patchwork (MT)
– Diamond Metal Plate embossing plate (Hot Off The Press/Paper Wishes)
– Baker’s twine, flower, button
– Stipple brush
– Mini mister
– Black, white, kraft cardstock
– Paper towel
Cardmaking with Distress Paint and Dylusions, how to make it—
1. Paint white cardstock with Tumbled Glass Distress Paint. Let dry.
2. Apply Squeezed Lemonade Distress Paint on craft sheet. Spritz with water and use the stipple brush to apply in a circular motion. You’re not aiming for total coverage, just to add a glow of yellow.
3. Spritz some Bubble Gum Dylusions onto a craft sheet or small palette. Use the cap of the Dylusions to stamp small circles on the painted background. Use a glue bottle or other, larger bottle to stamp larger circles.
4. Spritz water into remaining Dylusions and spatter onto the stamped cardstock with the stipple brush. Blot with paper towel.
5. Spritz with White Linen Dylusions. Blot.
6. When dry, add strips of washi tape as shown. Emboss with the Diamond Metal Plate. Mat on black cardstock, wrap with baker’s twine and add a small flower and button. Tie a bow in baker’s twine and glue as shown.
There you have it: Layers of easy, fun color!
Want to watch a video tutorial on this project? Then stop by Studio SN to watch Cardmaking with Distress Paint and Dylusions!


