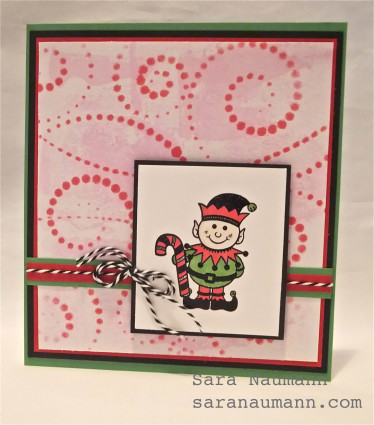
Today on Studio SN: Christmas Cardmaking with Stencils and Spectrum Noir!

Seriously, how cute is this elf? And even better, how fun is this Christmas card? Simple, easy and cheerful—this is one of those designs that just make me smile.
Christmas Cardmaking with Stencils and Spectrum Noir: What you need
– Spectrum Noir alcohol ink refills: PL1, FL1 (Crafter’s Companion US or Crafter’s Companion UK)
– Spectrum Noir alcohol ink pens: FS3, FS6, CR8, CG4 (Crafter’s Companion US or Crafter’s Companion UK)
– Art Screen Stencil: Swirl Dot (Clearsnap)
– Happy Elf stamp: Hot Off The Press/Paper Wishes
– Primary Ebony Superfine Embossing Powder (WOW! Embossing Powders)
– Embossing ink (Versamark)
– Cardstock: White (Neenah Classic Crest from Crafter’s Companion), black, red, green
– Mini brayer
– Craft sheet
– Baker’s twine
– Foam tape
Christmas Cardmaking with Stencils and Spectrum Noir: How to do it
1. Lightly brayer PL1 on a piece of white cardstock.
2. Place the stencil on top and hold in place. Squeeze a drop or two of FL1 on a felt pad and apply through the stencil, using a circular motion. Remove the stencil and clean immediately. (Rubbing alcohol works best.)
3. Mat on red, then black cardstock.
4. Stamp the elf on white cardstock with embossing ink and emboss with black. Color his face and ears with FS3 and add color to his cheeks and the tips of his ears with FS6.
5. Color the elf’s hat, stockings, collar and candy cane with CR8. Color his suit and pom-poms with CG4. Mat on black.
6. Mat a narrow strip of red cardstock on green, then glue across the stenciled background. Wrap with baker’s twine. Attach the elf with foam tape. Tie a bow in baker’s twine and glue as shown.
Cute and easy! Plus, coloring stamped images is one of those things that automatically relaxes me—do you find that, too?
If you want to see the video tutorial, just pop by Studio SN on You Tube to watch Christmas Cardmaking with Stencils and Spectrum Noir!


